Category Archives: Knit Hack

FREEBIE Busting Sock Stash (Part 1)

For all the posts in this series, you can go HERE!


If you have a bit of a sock yarn (or fingering weight yarn) collection (and by collection I mean a hoard) you are in good company. Most of us are guilty of picking up something pretty on a whim but never getting around to using it. And then somehow that skein multiplies, and somehow you find yourself with a very large collection of pretty skeins. How many small shawls can a person wear? Do you really see yourself making that many pairs of socks? There are certainly people who can and will made those socks and shawls, but for the rest of us, we need an alternative.

The option I propose – a project that will utterly deplete your sock yarn stash and rid you of stash-shame – is a scrappy crocheted blanket. It’s simple, mostly brainless, and satisfying. The granny stripe version has been very popular on Instagram lately and I think it is a brilliant idea (plus, the people making them seem to be very happy and satisfied with their projects). You can also find ideas under the following hashtags:

How Much Yarn?

A lap blanket uses approximately 1000g (1kg) of yarn (the average skein of handpainted yarn is usually 100g, so you would need about 10 skeins).

Stash Busting Protocol

This type of project will use up a large portion of your sock/fingering weight stash, and banish stash-shame. That said,  many people (including myself) usually end up coming into the store for an extra skein or two of yarn to complete their project. Don’t feel bad, it’s very normal, your stash probably won’t have the full spectrum of colours you want to use, or you might not have quite enough yarn – whatever, it doesn’t matter because you get a gold star for using up your stash!

Hook Size

For sock weight yarn use a 3.5mm/E crochet hook.

Crochet vs Knit

I prefer crochet because it is faster, you weave in the ends as you go, it doesn’t require any seaming, and the aesthetic is well suited to a scrappy aesthetic. That said, you can certainly knit your blanket too … see our Easy Baby Blanket Pattern (a Corner to Corner style blanket) for an easy knitted option. To expedite the project I would hold 2 strands together and work with a 5mm/US8-36″ (or longer) needle.

Granny Stripe COOMBO 2

Granny Stripe Blanket

Attic24’s Granny Stripe Blanket is a great way to use up sock stash. If you have a really, really big stash you can group the colours before starting and create something in an ombre or chromatic style (above right, Scrappy Granny Stripe Blanket by louisap).

If you like a totally random, cottagey aesthetic, just go with the flow and grab whichever colour you like (above left,Molly Weasley Cozy Scrappy Granny Blanket by StitchingPlaza). When I do things like this I usually put colours together that have a high contrast, in both colour and intensity.


C2C COMBO


Corner to Corner Blanket (C2C)

A Corner to Corner type blanket is a great alternative to the Granny Stipe, especially if you don’t know how large you want your blanket to be. Like the Granny Stripe, you can organise your stash ahead of time and create a chromatic look (above left, Gradients C2C by GameCakes), or make it a bit more random (above right, Corner to Corner Stashbuster by coxabey).

granny stripe COMBO

Photos: Judymac21 and coxabey


FREEBIE & HACK Baby Sock Hat

Koigu KPPPM Baby Hat Blue 1

Koigu KPPPM Baby Hat Pink 1

Easy Peasy Newborn Sock Hat

I whipped up these adorable little baby hats last week, they’re definitely very easy and kind of addictive! Of course, it doesn’t hurt that the yarn (Koigu KPPPM) is gorgeous and extremely visually satisfying. I’ve made two and I’ll cast on another tonight at SNB (I’ve got a display idea rolling around in my head and a good friend with a brand new baby).

Yarn Options

Any kind of sock weight yarn will work for this project, as long as it is soft and machine washable – it’s for a baby, after all. We made our samples with Koigu KPPPM, which are perfect in their little 50g skeins, or a couple of mini skeins of Madeline Tosh Unicorn Tails. A Sweet Georgia Party of Five or Wollmeside Taste of Wollmeise kit would make some adorable ombre baby hats!

Materials

  • FREE Pattern
  • About 25g of sock weight (fingering) yarn (see above)
  • 3mm/US2.5 – 16″ circular needles
  • 3mm/US2.5 double pointed needles
  • tapestry or darning needle
  • stitch markers (optional but very useful for decreases)


Koigu KPPPM Baby Hat Blocking

Knit Hack: Blocking

In knitting, it ain’t over until your project is blocked. I like to wet block, which means washing your project in a no-rinse delicate wash and laying it flat to dry. Wet blocking allows the fibres in your textile to relax and take their final shape.

In the photo above, the blue hat (above) has not been blocked, and the hat below (I have no idea who to describe the colour) has been washed.

BEFORE: Before blocking the textile was firmer, it had more body and memory, the hat held it’s shape, it was able to stand up without support, and the fit was smaller. Measurements: 6.75” wide at bottom (right above brim), 5” high

AFTER: After blocking the textile became floppier, softer, but less crisp. It was no longer able to stand up without a support, and the fit was larger. Measurements: 7” wide, 6” high.

There are, of course, other ways to block a garment, but I like wet blocking because it’s honest, it gives you the most information. Your garment is most likely going to be washed at some point in its life, especially if it is a for a baby. It also settles the stitches into their final place, smoothing things out. If your wet textile is looking a little bit droopy after wet blocking you can try steaming it to add a little bit of body and plump up the fibres. A hand steamer is great, but if you are using a steam iron do not press on your textile, just hold it over and let the steam do its job.

And by the way, when you are knitting a gauge swatch to check your tension, you won’t get a truly accurate number until after your textile is blocked. Generally, it is best to block in the same manner you are also going to launder your finished garment.

Koigu KPPPM Baby Hat COMBO BLOG.jpg

KNIT HACK Short Rows & Mrs Watson

Mrs Watson In Progress

Spring Knitting ADD: Part 2

Yesterday I spilled about my Spring Knitting ADD, and told you about the project I’m working on when the weather is warmer, Gillespie. Today is part two, the project I’m working on when the weather is chilly, MRS WATSON.

I’ve had my eye on Mrs Watson for a little while since it is designed with my favourite sweater yarn, Berroco Ultra Alpaca Light. The pattern is written by skilled shawl designer Martina Behm, so it’s got cred. After knitting six sweaters with the yarn I’ve got a few leftovers, and I figured I can probably work up something fun – hence multiple colours! I also like that the pattern has an interesting shape – it kind of looks like a leaf.

Mrs Watson KNIT HACK

Knit Hack: Colour Code Your Short Rows


The stripes in this pattern are formed by working short rows (wrap & turn), which aren’t hard, especially since you don’t have to pick up the wraps (a benefit to working in garter stitch). Keeping track of where I am in the short rows was less easy, especially if I was distracted, or recovering from a post Knitters Frolic hangover (it usually takes me a week to get back to normal after a big event). No problemo, I devised a Hack!

Hack Materials

Rainbow Locking Stitch Markers

This hack requires a very inexpensive, but specific product: stitch markers in the colours of the rainbow, two of each colour, and a total of 8 colours.

knit hack stitch markers

We are going to colour code our short rows with coloured stitch markers, so you know where each wrap is supposed to happen, and in which order they are going to take place.

1. Organise your stitch markers by colour, in the order of the rainbow: Red, Orange, Yellow, Green, Blue, Purple (I put peach after orange, and aqua after green). If colour theory isn’t your forte take a picture of your markers in order to help remind you later.

2. At the start of each short row pattern repeat, with your work in front of you, READ through the short rows (do not knit it) and place the markers, *in order*, whenever the pattern says to wrap & turn (W&T). Your first W&T will be red, your second will be orange, the third will be peach, the fourth will be yellow, etc.

Placing the Markers

In Leaf Pattern 1 of Mrs Watson, the instructions are as follows (omitting the actual pattern numbers – I don’t want to step on Martina’s copyright):

Row 2: K to X sts before centre st, w&t.  So we count to X stitches before the centre stitch, and place the first marker (red) on the needle there. Turn the work like you would if you were actually knitting.

Row 3: K to last Y sts, w&t. We count to Y stitches before the end of the row, and place the second marker (orange) on the needle. Turn the work like you would if you were actually knitting.

Row 4: K to Y sts before next wrapped st, w&t. We count to Y stitches before the next marker (the red), place the third marker (yellow) on the needle. Turn the work like you would if you were actually knitting.

Row 5: K to Y sts before next wrapped st, w&t. We count to Y stitches before the next marker (the orange), place the fourth marker (green) on the needle. Turn the work like you would if you were actually knitting.


This forms the first side of the short rows … now on to the second side …

Row 6: K to …. last X sts, w&t. We count to X stitches before the end of the row, place the first marker (red) on the needle. Turn the work like you would if you were actually knitting.

Row 7: K to Y sts before centre st, w&t.  So we count to Y stitches before the centre stitch,  place the second marker (orange) on the needle there. Turn the work like you would if you were actually knitting.

Row 8: K to Y sts before next wrapped st, w&t. We count to Y stitches before the next marker (the red), place the third marker (yellow) on the needle. Turn the work like you would if you were actually knitting.

Row 9: K to Y sts before next wrapped st, w&t. We count to Y stitches before the next marker (the orange), place the fourth marker (green) on the needle. Turn the work like you would if you were actually knitting.

You might be wondering why you need more colours of stitch markers? As the pattern progresses you’ll have more short rows in each section, and therefore need more markers.

Working the Short Rows

Ok, we’ve got our markers in place – now it’s time to reap the benefits! Again using Leaf Pattern 1 of Mrs Watson as an example:

Row 2: P1, k to X sts before centre st, w&t.  We follow the pattern and work to the first marker (red), slip the marker off the needle, wrap the next stitch and turn the work (W&T).

Row 3: K to last Y sts, w&t. Work to the next marker (orange), slip the marker off the needle, wrap the next stitch and turn the work (W&T).

Row 4: K to Y sts before next wrapped st, w&t. Work to the next marker (yellow), slip the marker off the needle, wrap the next stitch and turn the work (W&T).

Row 5: K to Y sts before next wrapped st, w&t. Work to the next marker (green), slip the marker off the needle, wrap the next stitch and turn the work (W&T).

Etc, yada, yada, yada … you get the gist of it – the markers you have placed will guide you where to w&t, and in which order they need to be done. Once you’ve finished your wraps there shouldn’t be any more markers on the needle. If you are extra cautious about keeping track of your wraps you can use locking stitch markers and place the marker that has been removed directly into the wrapped stitch – there won’t be any question after that.

Orienting Yourself

The whole point of this hack is to help you avoid short-row distraction disasters. So if you are distracted and come back to your work, wondering where you are in it, here are some clues to look for:

  1. Mrs Watson is essentially shaped like a leaf, with a main vein up the middle and secondary veins shooting off the sides. In the short row repeat, with the Wrong Side (inside) facing you, the right side of the leaf is worked first, then the left side is worked second.
  2. You will always know which is the next marker/w&t that is supposed to be worked because they are placed in order of their COLOUR.
  3. You will know which wraps have already been made because the markers will have been removed (or are in the stitches)
  4. Keep an extra locking marker on hand that looks completely different than the others you are using, and if you put your work down place the odd one in where you leave off.

Tracking Hack: Mini Charts

Another little issue my short attention span ran into in this pattern was the formatting. Sometimes the way a pattern is laid out on the page gets in the way of my being able to keep track of where I am in it. For example, in Mrs Watson the pattern says “Work rows a – g in Body Pattern 2 and rows a – h in Leaf Pattern 4 three more times. Work rows a – g of Body Pattern 2.” Great! I understand what it says, but looking at it makes my head hurt.

Knitting pattern publishers write things in this way to save space. If they wrote it out in a way that made it easy for us to tick it off as we went it would take up much more space, adding pages, and making the publication much more expensive. I bought Mrs Watson digitally and printed it out myself, but it was also published as part of a hard-copy book, which is part of the reason why the formatting is less brain-friendly.

Not to worry, there are workarounds for situations like these. My grandmother was a very experienced knitter and used to keep track of stuff with little checkmarks in the margin. But in this pattern the pattern repeats actually repeat, check-marking each line won’t work, there would be marks all over the frickin’ page! In situations like these you need to employ an information management system:

1. Re-Write

If you are a newbie or live with a learning disability and really don’t remember what you are supposed to be doing at any given time, you can re-write the prescient parts of the pattern row by row. I suggest doing this as a cloud-based digital document (like in Google Docs) so you can make changes, always have a copy, and return to your instructions on the fly (you’ll have access wherever your phone or iPad goes).  If you have a digital version of the pattern the PDF file might even let you capture and copy the text, so you can put it directly into your document file (you’ll have to change the formatting, but the text will be there).

As you knit, just tick off the rows as you work them. This method will use much more paper, but it will help you keep track of both where you are AND what you are doing. Plus, you can make and preserve copious notes to yourself in the document- always good if you make it again.

mini chart hack

2. Charty McChartface

If you are more seasoned and just need a way to keep track of where you are (and not what you are doing) consider drawing a little table or chart. If you are less experienced you can make them in a cloud-based document program (again, useful for revisiting past work). I just scribble mine in the margins of my pattern (a nod to my grandmother). The picture above is a little chart I’ve made for my current section of Mrs Watson.

Title:  Each pattern repeat section gets a chart, each chart gets a title – the title is very important, it lets me know where I am in the pattern. I’m currently working Body Pattern 2 & Leaf Pattern 4, therefore I have crudely titled it B2L4 (on the right side of the picture).

Rows: The next part is the table itself: I’m alternating two different types of pattern repeats, Body sections and Leaf sections, so my table has two rows, labelled B for Body, L for Leaf.

Columns: The final part is the columns, which reflect the TOTAL number of times I have to do each pattern repeat.  The pattern reads: “Work rows a – g in Body Pattern 2 and rows a – h in Leaf Pattern 4 three more times. Work rows a – g of Body Pattern 2.” So I have to alternate working the Body and the Leaf sections a total of four times, and then do the Body one more time; I need a total of 5 columns. I’ve blocked out the last space of the Leaf section so I know that it does not happen.

I’ve got five boxes for Body and four for Leaf. As I work, I check off the box for each section after I have completed it. If there is a mark in the box, I know it is finished.


Mrs Watson

After explaining all this in detail I feel like you might feel like it is a complicated pattern, but I want to assure you that is is not. It does require a little bit of information management to keep track of where you are, but that’s about it.

Yarn Options

Any Sport weight or DK weight yarn is ideal. The pattern is designed with Berroco Ultra Alpaca Light, an alpaca-wool blend, but for a spring/summer version try a seasonal yarn like Cascade Ultra Pima Fine, Berroco Summer Silk, or Handmaiden Silken.

Other Materials

Notes

BTW, if you want to make your Mrs Watson larger, Berroco published some instructions HERE, but it involves repeating pattern repeats, so you’ll have to plan this before your start.

Mrs Watson Hack COMBO.jpg

CLEARANCE & HACK Louet Euroflax Sport

50f7b-louet2beuroflax2bsport2bdisplay2b525

CLEARANCE Louet Euroflax Sport

Louet Euroflax Sport linen is the paradigm of natural, summer linen yarns. It’s extremely breathable and summer sweaters feel cool. It’s also machine wash and dryable, and with wearing it will become very soft with a beautiful lustrous silky effect. It feels stiff in the skein but loosens and softens up tremendously with wash and wear. It’s also one of the only yarns that looks and feels better the *more* you wash and wear it!

After you have made a garment out of our Euroflax linen, you will definitely want to make more!

  • 100% Wet Spun Linen
  • 100g/246m (270yds)
  • 2.75mm to 4mm (US 2 to 6) needles
  • Sport Weight
  • 24 sts = 4″ (10cm)
  • Machine wash on delicate with SOAK and machine dry, steam iron to enhance sheen (see full care instructions)
  • Pattern ideas

FREE Patterns

Shop Online Button Turquoise 250w

KNIT HACK Working with Euroflax

  • You must wash and dry all samples before measuring gauge. The knitted fabric relaxes after the first time it has been washed and the gauge will change.
  • Do not wash or dry the skeins before knitting. To soften, completely dry the garment in a dryer, and iron it with a steam iron.Louet Euroflax Sport  is very durable and is not adversely affected by machine drying. For best results, dry the garment in the dryer for 15 minutes, then lay flat to finish drying.
  • Louet Euroflax Sport  does not possess natural elasticity and is not suitable for standard ribbing, on either bottom borders or neck bands. Knit-in-hems, rolled borders, lace edgings and garter stitch borders all work wonderfully with this yarn.
  • More information on working with this yarn

RESTOCKED & HACKS Quince & Co Kestrel

073ed-quince2band2bco2bkestrel2bdisplay2bblog2bskeins

Quince & Co Kestrel

I’m kind of sweet on Quince & Co Kestrel – I’m working on our 4th project in it and my mind is already spinning, thinking ahead to the next. It’s a flexible aran to bulky weight, machine washable, and made from organic Belgian linen. It knits up quickly and the drape is divine!  Like all things linen, woven or knitted, Kestrel only gets better as you wash and wear it.


Shop Online Button Turquoise 250w

Quince and Co Kestrel COMBO BLOG

Kestrel Knit Hacks

Size

Linen has LOTS of drape, especially when knit loosely. Consider making a size smaller than normal, your finished garment will grow after blocking and with wear.

Joining

Tape or ribbon yarn like Kestrel yarn aren’t joined in the same way as other, regular plied yarns. When changing balls, you’ll need to sew the ends together with matching sewing thread – see this tutorial. You can alternately try this other method for joining hollow core yarns.

Winding

Linen balls are slickery and like confinement. After winding your skein, house it in a sock or the leg of some old pantyhose to keep it from becoming an unruly pain in the bum (I’ve been known to pick up cool coloured hose & socks if they cross my path at the dollar store).

Washing

What they say about linen is true – it washes extremely well, and gets softer and nicer after each wash. It is, however, not made from the cape of the man of steel. Like everything else, it’s vulnerable to abrasion, which will ruin the surface of the textile and make it mungy-looking (I learned this the hard way, curse words were uttered). Wash your linen in the machine, but always put it in a delicate bag. If you want to put it in the dryer I’d be safe and put it on cool and maybe keep it in the bag. The fibres will not shrink in the dryer, but they’ll contract a little, and again, my concern is abrasion.

Quince and Co Kestrel PATTERN daicey pullover

Daicey

I’m currently working on Daicey, it’s going extremely smoothly. It is a very simple top-down raglan with a smidge of A-line shaping and a pocket for a cute little detail. Mine looks great so far, but it won’t gel until it;s been washed and the fibres settle. I’m using a muted colour, Turtle, but I also have a client who’s working on it in Rosehip, and I can’t wait to see how the vibrant colour affects the design. I think her’s is going look a bit better, I think the brighter colour will make the details and the lines *pop*.  Who knows, maybe I’ll like it so much I’ll make another!  I’m also making a size smaller than normal because I expect the fabric will be stretch-city.

  • Quince & Co Kestrel: 8 (8, 9, 9, 10, 11, 12, 13) skeins
  • 6.5mm/US10.5 24″ circular needles
  • 6.5mm/US10.5 – 16″ circular or double pointed needles
  • matching sewing thread & needle
  • Pattern


KNIT HACK Pattern Provenance

It has been brought to my attention that some of you are not presently aware of the powerful extras offered in Ravelry’s database of patterns. This function is extremely useful when you want to know more about how a pattern is going to work out. You can see what types of yarns people have used, how the project has knit up, and modifications people have made to their version.

Personally, I especially like to refer to a pattern’s projects when knitting a sweater, because I want to see how regular people look in it (I’m not a candidate to be a sweater model, I don’t have the requisite large square shoulders and tiny bust). If I’m substituting a yarn I like to see what kinds other people have used, and how their projects turned out. I also like to see which colours the project looks best in. The provenance (a curatorial term that refers to the physical history and background of a specific piece of art) of a pattern can be extremely helpful.

So pull up your computer  (Ravelry is better explored on a computer, the mobile site for tablets and phones has limitations) and lets take a tour!


barley 1.png1. Details Tab

We’ll start our journey with a popular pattern called Barley. When you open a pattern’s page in Ravelry you’ll find a second tier of menus at the top, aligned to the right (Details, Yarn Ideas, Projects, Ques … etc). These tabs relate exclusively to the pattern and are a source of a LOT of useful information. When you open the page you will automatically be on the DETAILS tab. This is the pattern’s main information page, and offers details entered by person/s who created the entry in Ravelry (in this instance the would be the designers, Tin Can Knits, who maintain the page).


barley 2.png

2. Yarn Ideas

Click on the YARN IDEAS tab (to the right of DETAILS) and behold something beautiful! The YARN IDEAS page consists of the different yarns that people have used to make this pattern. It’s a popular pattern and it’s been made many, almost 13 000 times, so there are a lot of options to browse.


barley 3.png

Malabrigo Rios has been used 477 times (I don’t blame them, it’s one of my favourite yarns). If you click on the picture it will take you to the yarn’s main page, which will give you lots of info about that specific yarn. Instead, let’s click on the the link below the picture “used 477 times”.


barley 4.5.png

The “used 477 times” link shows you all the projects for this pattern (Barley) that people have made with a specific yarn (Malabrigo Rios).  You can browse them all manually, flipping through the pages, or you can refine the search even more. I like to flip through the pictures to get an idea of which colours I prefer for the project.


barley 1.png

3. Projects

Click on the PROJECTS tab (to the right of YARN IDEAS) and you will have access to almost ALL of the projects people have made with this pattern. Sometimes a pattern hasn’t been made much, and you can flip through the pages manually. In cases like this pattern there are a lot of projects and you might want to refine your search.


barley 2.png

Click on the FILTER THESE PROJECTS menu tab on the left side of the screen, and a menu will drop down.


barley 1.png

A bunch of options will appear; I think the most useful is ALL HELPFUL PROJECTS, so click on that.


barley 2.png

See the little round  red and white circles (highlighted in aqua)? Those are icons of life preservers, and they let you know that someone has found the notes in that particular project helpful. The number to the right of the icon shows you the number of people who have found it helpful.


barley 5.png

Let’s stop for a moment and decode those little symbols in the top right corner of each project’s box. The life preservers are the most important and useful, but the others can also offer a little bit of insight. The little hearts and the number to their right refer to the number of people who have favourited this project. The little blue speech bubbles and the number to the right of them refer to the number of people who have left comments on the project. The little yellow smiley face refers to how the person who made the project feels about their own product. Judging by the amount of interest in the project above I’d say there might be some useful info in it.

We’ll meet back up with the popular project above, but let’s get back to those little life preservers! Presently, there is not a way to sort the results, putting the most helpful at the top of the search. To find the most helpful projects we have to browse through manually and search for projects with higher numbers next to their life preservers. To scroll through the pages you can click on the PAGE NUMBER at the top (just above the pictures and below all the menus and search stuff), or click on the NEXT PAGE link on the right side of the screen.


baley 3.png

Conveniently, you can also find the same PAGE NUMBER and NEXT PAGE links at the bottom of the page. The number of the page you are presently on is coloured white, the other pages are light green.


barley 4.png

Above, I’ve scrolled through a few pages (I’m on page 4) and I found a project with 13 life preservers, 55 hearts,  and 2 comments (the aforementioned popular project from before). Click on the project’s title (in the purple bubble) and lets see what’s inside ….


barley 1 copy.png

Judging by the notes and the pictures, I’d say people like this project because it fits snugly; the original pattern is looser and slouchy. Like other people, I find the notes helpful, so I’m going to click on the little YES button to the right of “are these notes helpful?”, at the bottom of the screen. When you click on the YES button it adds your little life preserver and bookmarks the page for you (we’ll get back to the bookmarking at the end of the post).


barley 2.png

A little speech bubble pops up, asking us to highlight what was helpful. I don’t know how this actually makes Ravelry better, but it does benefit us in two ways:

  1. Ravelry ROCKS and *anything* that makes Ravelry better will benefit you!
  2. If you ever need to return to this project and seek out it’s knitterly wisdom, you will know why you were interested and exactly what you found helpful. I don’t know about you, but I’ve come to accept that I always *think* I’m going to remember, and I NEVER remember.


barley 3.png

Use your cursor to go over the words that you want to highlight (how this works will depend on your computer or tablet, but you just highlight or capture the words like you normally would to copy them). Once you release the cursor the words will be highlighted in yellow. There is a little “X” button at the end of each highlighted section of words. If you want to delete some highlighting just click on the“X”. 


barley 1.png

Back to that bookmarking … how, you say, will you ever find that project again? Good question! The helpful project is at hand in two ways, the first of which is embedded in the the original pattern’s pages. Go back to the original Pattern (Barley), click the PROJECTS tab, then click on the Filter These Projects. In the drop-down menu,  to the right of “My Helpful Projects” is a number. Click on the little box to the right of “My Helpful Projects” and ….


Screen Shot 2017-01-25 at 1.33.14 PM.png

… you get the projects you indicated were helpful!


Screen Shot 2017-01-25 at 1.00.52 PM.png

The second place your helpful pattern will pop-up is in *your* projects. Above is my own Barley project.  I made it a few years ago, but you can also create a brand new project, it doesn’t matter. Scroll down to the bottom of the project page and ….


barley 6.png

Ta-Da!  The project we marked as helpful is already bookmarked in our project for our edification and referencing pleasure.

So there you have it, yay for other people’s projects! There are more options in this area that you can explore, I’ve just taken you through the most useful features. Don’t be afraid to play around with the features on Ravelry, you won’t break it.


KNIT HACK Pattern Choices (Bon Bon Toques)

Bon Bon Hats 1.jpg

People often ask me what I am working on …. most of the time the answer is something for the store, and the rest of the time I’m usually fulfilling my self-imposed materteral duties and making something for my niece & nephew. I suppose it would be cheaper & easier to go out & buy them hats & such, but once they ask I have a hard time saying no to such a sincere request. Usually, it’s doll clothes, which I don’t really have an issue making because they get used CONSTANTLY, but this year new snow suits require new hats and neck warmers. The neck warmers are still forthcoming ….

Knit Hack: Pattern Choices

Freebies are nice, but sometimes it’s worth it to pay for a pattern. I chose to pay for the Bon Bon Toque by Tin Can Knits for a few reasons:

Reliability

Tin Can Knits patterns are reliable, and I didn’t want to have to tinker with a pattern too much. If there’s too much ripping back and restarting I find I don’t finish the project, especially when it’s a project I don’t find particularly inspiring.

Size Range

Tin Can Knits patterns generally provide you with a broad range of sizes, from baby to adult large. This really helps me with sizing for two different sized kids, especially if my tension is tighter and I need to go up a size to make the finished garment fit properly (which it was, and I did). Plus, if their parents want matching hats I can make those up without the exertion of having to modify a children’s pattern.

Re-Useability

The pattern is a classic look, and I can and may use it again. When you make something for a kid you never know if they are going to get really attached to it and want you to make it again 1. when they grow out of it,  2. when they lose it,  3. want it in another color, or all of the preceding. I try to make my self-imposed materteral duties as easy as possible to fulfill. The style also isn’t gendered, I can use it for both men and women, boys and girls.

Skill Level

Tin Can Knits patterns don’t tend to be too challenging to knit. They manage to keep things interesting without making you jump through hoops. The cable repeat in this pattern was simple and predictable, I didn’t have to refer to the instructions for every row, there wasn’t a complicated chart to follow.

Bon Bon Toque

I used Cascade 220 Superwash for this round of hats; I wanted a yarn that was machine washable, not too expensive, had a bit of a depth of colour (heathered colours work well for this), came a wide variety of colours to match their jackets, and was soft and comfortable. My tension with the yarn was a bit tighter than called for in the pattern and I didn’t want the textile to be loose, so I went down a needle size and up a size in the pattern (you can see my pattern notes on Ravelry).  I also elongated the ribbing to make it long enough to fold over  – I figured this might make the hat warmer, and give the garment a bit more longevity in the fit department as the kids grow.

Materials

Shop Online Button Turquoise 250w


FREEBIE Erie Hat

Making Gifts They LOVE: Erie Hat

At this time of year I’m generally scrambling for gift making ideas for you – after all there are 24 days until Christmas (23 until Channukah)! Of course, I can only guess at what you might want to make, and there’s also the larger question what your loved ones would like to receive. And then there’s the added problem that sometimes the two are at cross purposes. And then to make it even harder, lets factor in the sad fact that people who don’t spend their time around textiles or knitwear don’t know how to describe what they like.

Case in point, my friend Jane. Jane has made hats for her brothers in the past, but this year they have requested something that is more ‘expensive looking’. Jane uses nice really yarns, makes nice designs, and has a high skill level, so what the heck does ‘expensive looking’ mean?! Well, in translation, it means something that looks in style and possibly execution like it’s commercially made from conventional types of fibres or textiles – the exact opposite of what we, as crafters, like to do. We often like working with interesting, hand-dyed or multicoloured yarns, but our peeps aren’t necessarily into it. It’s not their fault, they’re muggles, have compassion.

As a nod to Jane and her brothers, above is a free pattern for an ‘expensive looking’ hat. It’s a basic slouchy, 1×1 rib hat that even the sulkiest of hollywood stars would hear. It can be made with a fun, hand dyed merino yarn like Mineville Merino DK (the greys and black are a good compromise) or Madeline Tosh Merino DK, or a staid, more conservative style of yarn like Cascade 220 Superwash Sport. The most popular colours are generally medium charcoal heathered grey, dark heathered jet grey, light heathered grey (notice a trend?), black, navy, off white, and then maybe the denimy blues.

SIGH, such is life … it’s dull work, but the payoff is when you see your gift being used CONSTANTLY, for years on end. Make a warm, soft, boring coloured ribbed hat and they will wear it for ever and ever and ever.

Yarn Options

Other Materials

  • FREE Pattern
  • 4mm/US6-16″ circular needles
  • 4mm/US6 double pointed needles
  • stitch marker
  • tapestry/darning needle


Shop Online Button Turquoise 250w


KNIT HACK Sweater Season Prep

It’s October, the days are getting cooler (well, some of them are) and it’s time to spring our sweaters from their summer slumber. Sometimes, no matter how meticulously you packed your sweaters away and protected them, they still end up with little holes, which of course you don’t notice until you put them on. Today’s post is about mitigating the damage that’s already been done.

1. Inspect

As soon as you spring your sweater from storage prison give it a good inspection. In a well lit room give it the once over, hold it up to the light to check for holes or weak spots. If you find any immediately put a pin in the hole to keep it from growing, or temporarily sew it up with some contrasting coloured sewing thread.

DO NOT WASH your sweater until you have permanently mended the holes! If you do, the holes will get bigger, and be much harder to repair.

gleeber-blog-post-2

2. Shave

Now is a good time to remove any pilling or fuzz from the surface of your sweater. As you go pay close attention to the surface of the textile and look for more problem spots.

gleeber-blog-post-3

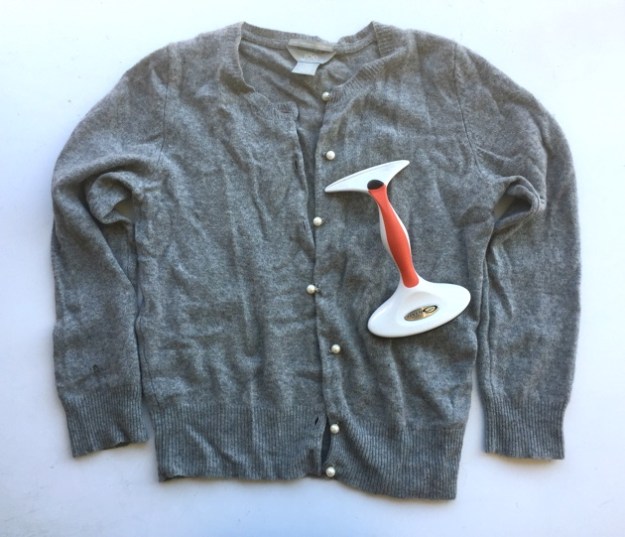
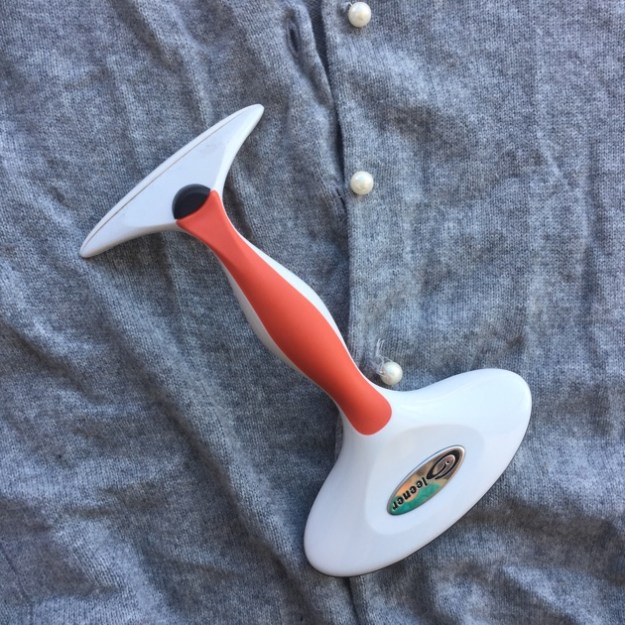
I love my new Gleener, it’s proven to be a great little gadget (and it’s Canadian)! They come with 3 different heads to accommodate different textiles. Above is my very fine store bought cashmere  sweater, on which I used the gentlest head. If you aren’t sure which head to use just start with the gentlest and move up. Be sue to read the instructions that come with your Gleener, or you can download them from the Gleener website.

Shop Online Button Turquoise 250w


gleeber-blog-post-1

3. Secure & Repair

Secure your holes! While Gleening I found one in my cashmere sweater and temporarily secured it with a pin. As soon as possible mend the holes; small ones are easy to fix almost invisibly, but larger ones will cause drama and tears.

I generally sew up little holes with matching sewing thread. (Whenever you are at a dollar store and see a set of tiny little sewing thread spools in a pile of colours GET IT! They are an excellent and cheap source multiple colours of thread, which come in extremely handy when making repairs.) If the holes are larger you may need toe fix them with left-over yarn from the project ….. but that kind of mending is a whole other blog post.

Now, once mended, if you want to wash your sweater, go for it. I suggest using either Eucalan or Soak delicate wash, both are excellent products, are Made in Canada, and you don’t need to rinse them out.

Now you are ready for fall!

KNIT HACK Communal Blankets

Communal blanket projects are extremely endearing ways to share your love with a friend, especially if they are ill or a new baby is on it’s way. A communal project generally involves a bunch of people who each knit at least one piece, and then all the pieces are joined together into a blanket. I’ve been involved in two communal blankets, and  after stumbling across a post on marthastweart.com on a communal baby blanket I thought this might be an excellent opportunity to discuss the ins & outs of this very unique type of project.

Expectations

Set realistic expectations. You’ll probably be wrangling a bunch of people who are at completely different skill levels and knit at different tensions. No matter what you do, or what kinds of constraints you impose, their pieces are probably going to come out looking completely different; the size, tension, thickness and shape will all probably be unique.Trying to get a bunch of knitters to follow instructions and make perfectly uniform squares is like herding cats. The aesthetic of you communal blanket will likely be kind of “wabi-sabi”, and I suggest you surrender yourself to the process and let go of any dreams of perfect little squares – it is what it is, and you’ll only be making yourself frustrated otherwise.

Yarn Suggestions

Cascade 220 Superwash Solids & Cascade 220 Superwash Heathers

Berroco Vintage

Malabrigo Rios

Cascade Avalon


Guidelines

You need to set some project guidelines, otherwise you’ll end up with a bunch of pieces that are impossible to cobble together. If you can, I would choose one yarn and have everyone work with it on the same or similar needle size.

Yarn Size

Choose one size of yarn and stick with it. I suggest Worsted, it’s easily available at every level of retailer, in all kinds of different fibres, and is easy for everyone to work with.

Needle Size

Instruct your knitters what size needles to use: 4.5mm/US7 is usually safe for worsted weight yarn. Unless you are working with a group of established, avid knitters, most of your contributions are going to be coming from people who really don’t know anything about tension or needle size, and they need direction.

Fibre

As I said above, if you can get your knitters to use the same yarn, but in the very likely event that this is not possible, make sure they choose yarns that are Machine Washable. Don’t fret too much over what kind of fibre they choose, the thickness is what matters when it comes to assembly.

Colour

Colour is up to you. If you can wrangle your knitters to all work in the same colour palette it would definitely look neat. For example, different shades and textures of the same colour yarn (a monochromatic palette) would be really nice. I’ve noticed over the years that colour is very subjective, and people think about colours in very different ways, which are very hard to communicate. If you are going to ask your knitters to limit themselves to specific colours, I’d keep it simple, stay with colours that are easily communicated, that everyone understands, like white, red, navy blue, black.  Don’t ask for ambiguous or overly specific colours (for example salmon, mauve, mustard, royal purple), your knitters are most likely not going to be able to come through. If possible, I’d stick with solid and heathered colours – variegated do not play well with others and when mixed in don’t create any kind of aesthetic harmony or balance (ie. they look like a dog’s breakfast).

Cast On

It’s a good idea to suggest the number of stitches to cast-on. Your knitters’ work will still come out at different tensions and sizes, but they’ll be somewhat similar, and you’ll have a good idea about how many pieces you need to make the blanket. The standard tension for worsted weight yarn is 5 stitches per inch, multiply that by the number of inches wide you want the square to be:

tension of 5 stitches per inch  x  6 inch square = 30 stitches to cast on

  • 4 inch square = cast on 20 sts
  • 5 inch square = cast on 25 sts
  • 6 inch square = cast on 30 sts
  • 8 inch square = cast on 40 sts

Don’t bother suggesting the number of rows to your knitters, their row tension will be unique and depends on their stitch pattern and personal tension. You can suggest the type of shape you want (square 6″ x 6″, rectangle 4″ x 6″, etc), but you’ll probably only get an approximation anyway.

Stitch Pattern

I wouldn’t bother asking for anything specific, mix-n-match patterns look cool in a patchwork, and being able to try different stitch patterns will keep your knitters entertained.


baby-blanket-martha-stewart-3
Photo: marthastewart.com

Logistics

Size

Before you start, decide approximately what size you want your blanket to be. Based on this you’ll need to figure out what size you want your squares should be. Say we want to make a baby blanket approximately 32″ x  32″, find a number that divides easily into the length of one side, and that can be the size of a square (32 divides nicely by 4 and 8):

Length of blanket / Length of a square = number of squares you’ll need to make that side

32″ Blanket / 4″ square = 8 squares on each side.

To find the total number of squares required:

8 squares up the side  x  8 squares along the bottom = 64 squares total

64 squares seems like a lot to get people to make, and also to assemble. That might be a bit ambitious. Let’s try again with the other number that worked with a 32″ length, 8″ squares:

32″ Blanket / 8″ square = 4 squares on each side.

4 squares up the side  x  4 squares along the bottom = 16 squares total

16 squares sounds much more manageable! You could also used 6″ squares to make a 36″ x 36″ blanket (you’ll need 36 squares that are 6″ x 6″).

Allotment

Now that you have an idea of how many squares need to be made, finalize the total number of knitters. Don’t give more than one square to your less experienced knitters, unless they want to. It’s a lot more work for them than it is for a seasoned knitter.

Ends

Regardless of how you plan to join your squares, ask your knitters to leave nice long ends! If you’re going to crochet around the edges and then join the pieces you only need about a 6″ end to weave it in. If you are going to seam the pieces together with the ends, ask your knitters to leave the ends about 3 times the length of the square (this is a pretty generous approximation) – and don’t forget to ask for a long cast on strand too (although they may not have the skill to do this, so you might not get your wish). That said, I think it makes life easier to weave in the ends and join the squares with a separate strand of yarn – if you have to undo your squares and take things out it will make life MUCH easier. You can ask your knitters to weave in their ends, but they may not know how, or at least how to make it look nice, so you might want to do it yourself.

Scraps

Extra yarn can be extremely useful when it comes time to assembling the blanket. You may need to crochet around the edge, add an inch in length, or make a whole extra square to make the composition look balanced. Do not be shy about asking your contributors for the leftover yarn from their square/s.

Blocking

You’ll need to block your squares before assembling them. I suggest you wash them in Eucalan or Soak and lay them flat to dry. If some of the stitch patterns naturally contract (like ribbing) you might need to pin them down to really flatten them out. Ribbing, cables and lace all need to be blocked to get their true size and shape.

Joining

Lay your squares out on a flat surface (table, floor) and get an idea of which square fits where. The pieces probably won’t line up exactly. It’s not actually a bad thing if they are very wonky, you can always knit some pieces to fill in odd spaces. Otherwise you can crochet around the edge of a piece that is too small to bring it up to size. Once you’ve got your pieces laid organized, take a picture of the arrangement as a reference (you’ll have to reclaim the table at some point).

You can join your squares in a number of ways:

  • To create some uniformity, crochet around the edge of each piece and seam together using Mattress Stitch (use a single crochet stitch, the crab stitch won’t work well here since we are joining the pieces). You can use the same colour for the crochet edge or a bunch of different ones, it’s up to you and the aesthetic you’re going for (this is a great way to use up scraps!)
  • For a fast, easy, but slightly raised seam, you can use a Slip Stitch Crochet Join.
  • If you want a simple, flat seam use Mattress Stitch. With mattress stitch you can also try to stretch your squares into shape and try to force them into a space. One caveat, I don’t feel they really ever truly submit – if the square is strained or compressed it’ll always look that way (poor little square).

Border

You don’t have to make a border around the entire blanket, but it will unify the piece (as much as it can).

You can do a few types of edges:

  • If you joined the pieces using a slip stitch crochet you might want to continue with this look. For a slightly more substantial border you can also do a row of Single Crochet after your slip stitch row.
  • You can pick up the stitches along the edge, knit a few rows of garter stitch, and cast off. It is easiest to do this one side at a time, log-cabin style.

Whatever techniques you use, you’ll be picking up stitches and you’ll have to eyeball your tension to make sure your piece isn’t buckling in places. It’s more art thank science – c’est la vie.

baby-blanket-lucy

Above is my Niece Lucy’s communal baby blanket. My brother commissioned it as a gift to my sister-in-law for the birth of their first child. I advised on the project, their extremely generous friend Heather put it together, and the squares were made by a broad group of friends and family (the duckies were made by my mom, the log cabin pieces are mine, and I think the little sail boat and sheep were Heather’s. As a baby Lucy loved looking at all the different pieces (especially the big duck – score one for my mom).  Lucy’s dolls still enjoy and use her blanket.